Sunday, 3 March 2013

FMP 09 Progress

The ship has come along leaps and bounds this week and i've never been so in too a project this far in. I made up for the time i lost a few weeks back and i've worked on improving the silhouette and realism of the ship, rather than moving away from something i was enjoying and progressing so quickly on.
This was the stage i was up to at around Wednesday  i'd put a lot of the base textures on my assets to get a feel of scale for the tillable and whether the colour pallet was working and if there were any noticeable problems. I had to re-unwrap the hull as there was some texture stretching from some additions i had added through this week. 

I also made use of some basic decals to break up the tillable textures and add more texture variation and colour. I used a leaking decal as well as two wood variation textures. I also down sized all of my original textures as i was still using the TIFF files in many cases instead of the downsized DDS files. This literally didn't affect the texture resolution at all which i was really surprised at, i think this was because they were being reduced in engine anyway.

This was the ship as of about an hour ago. Just looking at difference you can see i have broken up the hull with steps, ive added in the cannon hole flaps which breaks up the silhouette even more and brings it away from looking repetitive. I've worked on the rigging and the mast a lot this week. I've broken up the colours with some red on the central mast. I reckon i might add some sculpted details, such as lantern holders and rope ties around the masts. The rigging was unwrapped properly this week and i've managed to use my rope textures for both the new smaller rope and the older thicker ropes by using colour grading in the diffuse in Cry. I'm aiming to break up the ship and bring it to life even more by adding the rope tied areas and maybe have some broken parts. 

It was this week that i considered the option that this ship was in for minor repairs and i might have areas with fresh paint decals and paint buckets on the rigging supports. I still need to model and bake down the rigging pully's to give them more definition as they are currently using another textured area of the rigging unwrap. The front of my model got some TLC this week and ive added some support joists and a more interesting silhouette and appearance to the front sections. I'm aiming to have some more fine details in these areas as well but that will progress when i get to a further stage.

I'm still not completely happy with the railings around the ship and i think i'll have to go back to these at some point and try to break up the repetitiveness of them. Maybe use some rope rigging on some areas or have some more intricate pieces at ends and bends.

One area that i focused on this week was the interior, being at least a month in to this project means that i should at least have a block out and i'd had enough of making myself put it off. I white boxed it in max and tried to get the right shape and size of rooms and assets. I'm aiming on having the captains quarters and the first and second's mate area playable. I had to go back between max and cry a few times to scale chair and tables down to give them the right look but other than this i didn't run into a lot of problems. The inside of the ship was changed to incorporate flat sides to allow furniture to fit easily and i added portholes to the rooms to add a bit more light and break up the walls. 

I'm glad a white boxed it as it gives me a clear understanding of what is needed in the rooms and how long i should spend on it. I want the interior to be a main focal point of the ship so it needs to look the best i can manage. I produce a grey scale paint over to give a sense of what i wanted to achieve in doors and it also give me a very quick and easy way to concept.

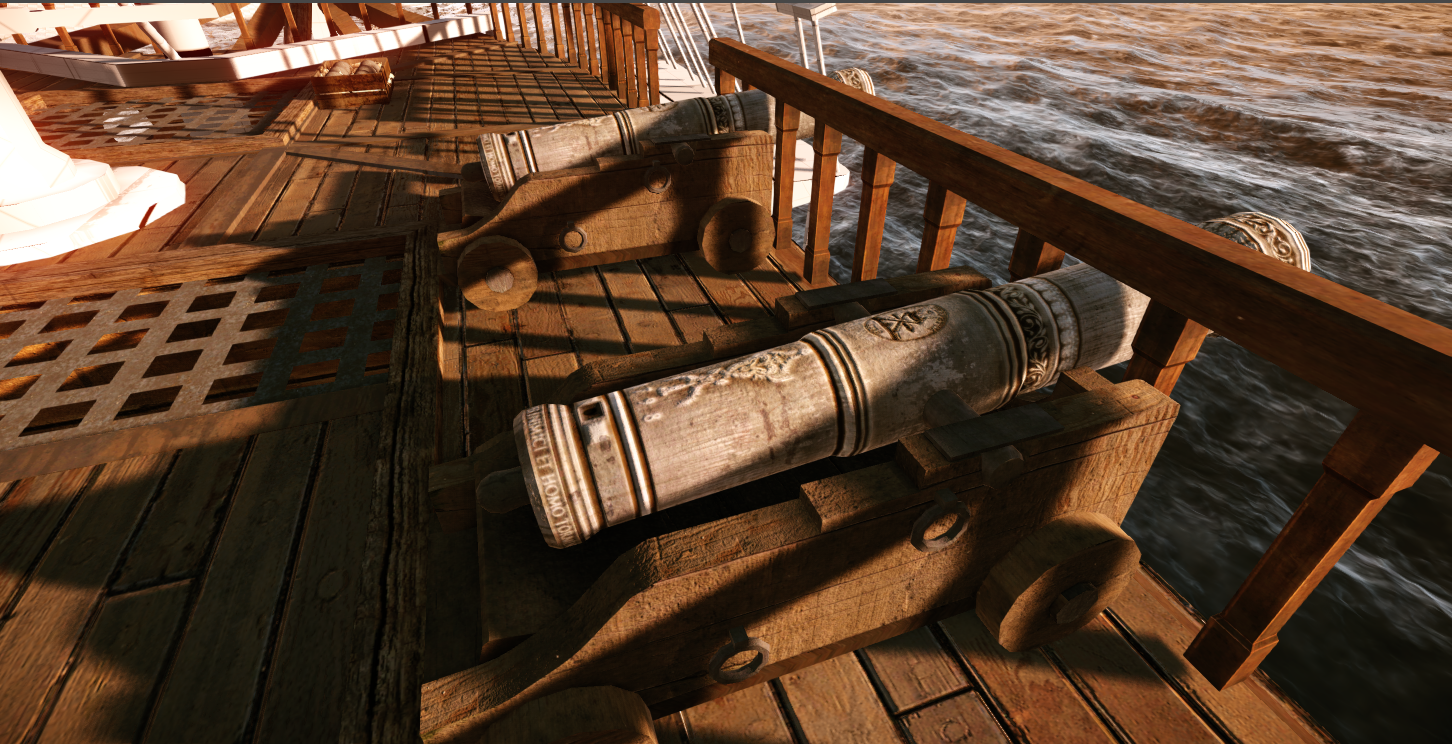
The exterior is back, broke up the flat pieces with planks and i think i've blocked out the final size and layout for the overhang part of the harbour. I want to have a few boxes and barrels waiting to be delivered or loaded. I might see how feasible it would be to have a crane lifting a cannon onto the ship but i have to consider the time constraints for the project.

I added the interlacing of the rigging and my oh my it was expensive, i used 5 sided ropes and it came to 53k of roped rigging. Didn't have any visible negative effect on the frame rate for my level so its staying, and it seems like the only way i would be able to make it look good.
Other notes would be, need more cool colours, i toned down the blackness of the shadows which helped a little and also made areas more visible. I might have the cool colours coming from the sure. The whole beacon in a dim world thing going on.

Monday, 25 February 2013

Cannon

Made my cannon texture today, might come back to this and try to work in more colour variation in the metal but pretty happy with it.

Sunday, 24 February 2013

FMP 08 Progress


I started this week by using the default cry engine material to help me work out how i wanted my lighting to behave early on. this allowed me to get a good understanding of form and how the object in my scene looked, without the interference of textures.
I also began to import untexture assets into the scene, to flesh out the ship and work out the sizes of spaces and wether there needed to be any adjustments to shapes and sizes at this early stage. I needed to raise the height of the railings so that they fit in better with the size of some of my assets.
It wasn't intill i put in the rigging of the ship that i really got a sense of scale or reached the point that i was completely satisfied with the direction of the project. it gave the eye lines to fall back on in the upper areas and made the project feel and look like a ship. I decided against using rope volumes as they were a little buggy and it wasn't my intention to break them at this point in the project.
This fleshing out stage gave a more dynamic and interesting appearance and silhouette to my ship, making the ship feel more busy and crowded. I think what will set this project apart from other games and levels with ships will be having interesting areas that are busy, crowded and seem more real.
The next stage was to get a lighting set up that worked well with my intentions. The visit from Ben at crytek really helped me decide on what i wanted to do for this. The golden sun that i picked gives a warm and majestic feeling. This would give the player a sense of the ship being a beacon of hope against what is probably going to be a beaten town harbour town.
THE CANNONS. Oh my the cannons were put in this week and this project started to progress noticeably.  I realised that there were a lot of cannons and this might make it hard for me to make this ship feel like it has that many people aboard. I reckon there would be a crew of about 38 and i need space for these people to sleep and work.
The harbour blockout was a way of getting an idea of the shape of what i wanted to produce. I wanted to have a small market area and a few houses in the playable area.
More textures, the end of the week brought about putting in of the textures again. I lowered the saturation of the orange wood so it wasn't so unnatural. Other changes included adding a trim around the ship to break up the shapes and focus of the cannon deck. I've added internal support structures and external struts and braces. This added to the silhouette. The cannon holes had to be lowered because my cannons needed to be bigger to feel real and usable as they were so low down to the floor. I feel the golden light works well with this set up and i don't think there will be a lot of changes to this for the foreseeable future.


Sunday, 17 February 2013

FMP 07 Progress

This week i went home, so i didn't get a whole lot done, but below are some screenshots of the progress i made on my assets. I got a whole lot of barrels done and all of these are off of one texture. I'm going to have the remaining space as a alpha texture so that i can put writing on some of my barrels to break up the repetitiveness. The metal texture uses a tiling texture that also currently does my cannon ball and cannon base texture.
Currently i rendered out the texture at 2048 so as to give me more room to work with as the project progresses.  
Below are the same meshes but using a reduce 512 texture and there isn't a huge difference between the textures and considering how large the mesh will be in game i think this texture would be the best to use for the final models.
My plan for this week is to produce some tilling textures for the harbor town so i can begin to assemble a town area.

My tiling roof tiles
My tiling brick tiles


Tuesday, 5 February 2013

FMP 06

FMP 05/02/13

This week marks the official beginning of my Final Major Project, I have produced some test pieces from the beginning of January but now I will be working full time. The things I want to achieve this week are to get a solid model, textured and imported into CRY of my Ship. This will allow me to check the scaling and to remember what the process is for exporting and setting up CRY files.

I will also aim to get my initial environment and time of day settings to a nice standard; this shouldn't be finished as I will edit these as I go, to improve as my project progresses.

Progress – Tuesday

Having already got the majority of my base mesh completed it was the unwrapping and finalizing/remodeling of some areas that have needed to be completed over the last couple of days. I exported my model before I was finished in order to see whether it was working correctly, unfortunately I was having problems with the normal directions as some areas of the deck were a lot darker than other areas. Consulting with people in the labs and Heather we ruled out; normal’s direction, smoothing groups, unwelded vertices. Having ruled these out I decided to re-unwrap the model.

My previous model had been unwrapped according to the symmetry modifier. This fixed the issue almost instantly and it was to do with the normal being pulled down. However this didn't completely fix the model as there were still areas that weren't the colours or lightness as what my material was supposed to be. I fixed this by editing the T.O.D. settings and bringing up global illumination and reducing the HDR settings to stop the camera from lighting and darkening the screen so much.

The next issue I faced with this model was the Multi-sub material wasn't working and it was only applying one material. This problem was fixed by reassigning material in 3DSmax and attaching all the parts of the object when unwrapped and re-exporting. By having tight geometry I managed to get rid of gaps and have a more flexible platform to work off to add other aspects of the ship.

The ship model at the moment has 5 material I.D’s and these materials were created whilst working on my previous (sorry guys not for public domain) Speedo project. They work well but I feel I could make better use of them by creating a better normal map and using displacement.

Unfortunately this week I can’t produce any work at home because my computer is having problems, which is limiting what I can complete and leaving me a bit stuck at what to do in the evening, other than blog and design document work. But this is probably a good thing as this project is 4 months and if I don’t keep on top of it I will struggle to produce a good amount of consistent design work.

What I aim to complete for the rest of the week;

I’m hoping to create some sculpted normal’s for various textures I will be creating, I will also aim to start creating a dockyard so that I have some area for my ship to be situated. 


Started by creating cross sections to model over to get the basic shape, once i understood the ship building plans this was relatively straight forward and i managed to get a basic block out to see if my idea was viable and where i wanted to bring it. The first block out was a single deck war ship and i decided it would be more visually interesting with two back sections without creating a lot more work.

Unwraping the model and creating air tight interior spaces was next on the list as once these were completed the basic shape of the ship would be completed.

I decided to add a hold space that was visually interesting, and was based of some of Empire: Total War's ships, this gave the space some more vertical space and a transition between upper and lower decks.

The finished model without errors in Cry engine, this lighting set up was quite nice as it created a more orange light setup. However i've since lost this set up whilst tweaking the T.O.D. settings

Turquoise boxes are human height for scaling - 170cm.

Above and below are where i am at as of Tuesday evening, the boat is unwrap and the main ship shell has been completed ready for additional meshes to be implementing into it. It will have to be re-exported to allow for doors and other changes. However it is fundamentally complete and does not require a lot of change. The lighting setup is not final, i feel it is too bright and i need to lower the Bloom of the horizon and try to get more atmosphere into the level. This will depend on what weather i want in my level, as i'm not sure if i want it to be typical English overcast or warm morning or even rain.

FMP 05 Design Brief


Design Brief
Final Major Project – 18th-19th Century Ship & Harbour

Initial Brief:
“To create a realistic ship and harbour area, using authentic reference to produce a fictional location. Using Cry Engine 3, assemble and light the level to create atmosphere and to best show the assets created. Consider composition of areas to create key focal points to show in a portfolio.”

Requirements:
Style                        -Visual realism at the turn of the century 18th-19th
Audience                  -Teen to adult core gamers
Target Platform        -Modern PC/Cryengine sandbox 3
Timeframe                -4 Months (approx.)

Purpose:
To demonstrate the following set of skills for use in an environment artist’s portfolio:
Art                          -Modular Assets Construction
                                      -Scene Composition
                                      -High Poly Modelling & Baking
                                      -Tilling Textures
                                      -Clear Material Definition
Technical                  -Lighting and Post Processing
                                      -Particle Effects (Limited by Cry Capabilities)


Targets:
Must run at 30 fps at throughout level at all times
Coherent Texture quality aiming for a minimum of 256 pixels per meter of playable space
Reduce repetitiveness of assets by creating variations by decals and texture coordinates
Create a visually stimulating environment

Budgets:
Budgets are defined from an initial asset list created and are based on estimates of triangle and texture usage of assets. By setting a limit the project management and asset priorities can be better controlled.
Triangle                             -An initial budget of 150 thousand triangles for non-instanced assets.
Textures                   -An initial budget of 150mb
Scope:
Environment (Ship)
Create a complete ship deck and body, paying attention to the path of the player. Interior space must include captains quarters area and any filler space between this area and the ship’s deck. Environment should be populated to an extent of making it feel lived in and immersive to the player.


Environment (Harbour)
Environment must encompass the ship aspect of the level, a semi-circle of onshore area must be produced to a similar detail as that of the ship and should be navigable. A number of buildings and other assets must be created to make it feel like a harbour of the time period.
Programs Used:
The following programs should be used in this project:
     
    WORD             EXCEL         3DSMAX     PHOTOSHOP    ZBRUSH   CRAZYBUMP   CRYENGINE 3
Any other programs that may be used will be credited in the design document as the project continues. 

Sunday, 13 January 2013

FMP 04 Project Outline


My project outline will be as follows. I will be creating a late to early 18th-19th century warship, this time period was consistent with grand ship building and expansion of the British Empire. I will create the scene in a fictional English dockyard and if possible I will have a small playable onshore area. I will try to create an authentic era scene by using reference from that time period. However I may have to take some artistic license in the building the scene as it is difficult having a full picture to work from. I am using this project to have a solid level design in my portfolio and to practice and improve my abilities with a variety of previously used programs and new programs I may wish to experiment with. I will focus on realism whilst keeping the frame rate usable. I want to create consistent levels of detail and make the space feel real and lived in.

About the ship, I want the naming of the ship to be as important as all HMS ship’s, I want it to be something grand and absolute, with this I came up with, eminent, revered or resolute. I've chosen revered as this was a name that hasn't been used by the royal navy and it fitted in with what I wanted the ship to represent.

Revered - Feel deep respect or admiration for (something).

I wanted the ship to belong to a wealthy captain who respected the laws of the sea and who knew how to sail and lead his men. I want certain aspect of the ship to represent this; I want notes of wealth from the captain for himself and the ship and crew. Maybe hinted as him being a buccaneer or pirate at some point but one that respected his crew and now fights for his country. I want intricate details on cannons and props.

I want to make the most of the time I have for this project and as such want to create a full scene that looks and feels finished, depending on how the project progress’s I wish to have 3 stages of completion. The first being all primary assets and level completion. The second stage would be to include additional props, assets, area and animation to make the scene dynamic. Thirdly I wish to include various and multiple extra levels of detail to both the ship and onshore, I want a dynamic environment that makes the level stand out.